Workshops
Course Objectives:
In these courses, the student will successfully develop sequential skills. Step-by-step building blocks will provide a non-intimidating atmosphere for all student learning. This learning environment provides a fun, cooperative and successful growth in clay. I make every effort to simplify the teaching process so that it is understandable and provides growth. The students will take the fundamentals learned back to their home studios and continue their journey in clay.
Sample of one-day demonstration: Pinch Pot Portrait in ClayAn easy, non-intimidating way to use five pinch pots to achieve a human bust. |
 |
|||||
| 9:00 | ▪ | Welcome, intro, a little philosophy, thank you to the host center. | ||||
| 9:15 | ▪ | Go over tools used for basic sculpting. | ||||
| 9:30 | ▪ | Start with overview of building up the portrait. Questions always welcome. | ||||
| 10:00 | ▪ | Show how two pinch pots are joined to create the "Egg Shape". Show pinch pot neck process. Join to "egg". Add the mandible and you have a skull! | ||||
| 10:30 | ▪ | Follow the directions in the booklet. It's so easy it's embarrassing! | ||||
| 11:00 | ▪ | Demonstrate easy ways of locating proportions, eye sockets, ear line all end up on same horizontal line. Eyes, nose and lips should be done by now. I will go step, by step. Let dry to leather hard during lunch. | ||||
| 12:00 | ▪ | Lunch time. | ||||
| 1:30 | ▪ | Check drying pieces for additional construction. | ||||
| 1:45 | ▪ | If not dry, use this time to show slides (half-hour). (May be adjusted to end on the hour if pieces need to be worked on after lunch.) | ||||
| 2:15 | ▪ | Start putting finishing touches on portraits, eye brows, lashes, hair and shoulders. | ||||
| 3:00 | ▪ | Finish entire head and dry in order to cut away excess clay. Allow to dry completely. Cannot fire it if it is too thick or you will break things! | ||||
| 4:00 | ▪ | Clean up and finish by 4:00pm. Give away "door prize surprise". This event can be shortened to fit school timetable. | ||||
back to top |
||||||
Sample of one-day demonstration: The Figure in ClayThe focus of this class will be modeling the human figure in three dimensions. Learn the difference between armature and non-armature related construction. Students will approach the figure by building from the inside out. Muscles and skin are added as we build up fullness on the torso. Arms, legs and head will be modeled and added to the torso. After the figure is complete, we will hollow out overly thick areas to be able to fire the piece. Figures will be from 9 to 12 in. in size. |
||||||
| 9:00 | ▪ | Welcome and introductions. | ||||
| 9:15 | ▪ | Go over basic tools and expectations. | ||||
| 9:30 | ▪ | Start with spine, chest, and hips. | ||||
| 10:00 | ▪ | Use six coils to stabilize torso area. | ||||
| 10:30 | ▪ | Add musculature to form chest and back. | ||||
| 11:00 | ▪ | Roll out skin to cover torso. | ||||
| 12:30 | ▪ | Model the legs, arms, hands, and feet. | ||||
| 12:00 | ▪ | Lunch time. | ||||
| 1:30 | ▪ | Attach all appendages. Clay is soft enough to bend. | ||||
| 2:00 | ▪ | Construct head and attach to neck. | ||||
| 3:00 | ▪ | Refine anything that needs it. | ||||
| 4:00 | ▪ | Allow to dry before firing. | ||||
back to top |
||||||
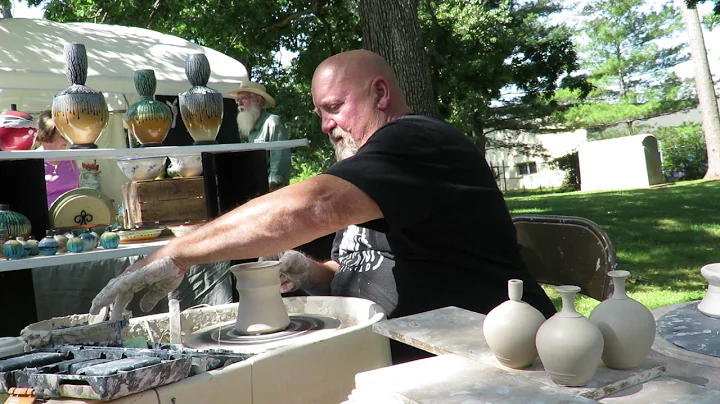
Sample of one-day demonstration: Wheel ThrowingUsing the potters wheel, we will introduce throwing off the hump and traditional throwing techniques off the wheel head. |
 |
|||||
| 9:00 | ▪ | Welcome, intro, a little philosophy, thank you to the host center. | ||||
| 9:15 | ▪ | Reinforce fundamentals of centering, opening, and pulls. Bold undercut and cut-off. Why? It is less intimidating and more efficient than other starting methods. Questions always welcome. | ||||
| 9:45 | ▪ | Show growth of items that can be made off the hump. Advantages and disadvantages. Allow pieces to dry while throwing more. Go over the ability to "sketch" off the hump and use the small pieces to generate shapes for new, larger pieces. Emphasize series and practice! | ||||
| 10:30 | ▪ | Start throwing items off the wheel head and demonstrate full process from start to finish, taking wet pieces off the wheel head. | ||||
| 11:00 | ▪ | Demonstrate easy altering ideas, torque technique, rim fold over, accent marks, trimming on the wheel head. Show advanced technique of donut making for leather hard use in building teapots. | ||||
| 12:00 | ▪ | Lunch time. | ||||
| 1:30 | ▪ | Check drying pieces for trimming demo and tea pot construction. | ||||
| 1:45 | ▪ | If not dry, use this time to show slides. | ||||
| 2:15 | ▪ | Start re-throwing larger items show two-rib method, under cut for efficient hand position (no bumps) Use this time to add necks and rims to previously thrown pots. Again showing the efficiency of using the "hump" method. | ||||
| 3:00 | ▪ | Put together teapot using thrown parts off the hump. Trim any piece that needs it. Give away "door prize surprise". | ||||
| 4:00 | ▪ | Clean up and finish by 4:00pm | ||||
back to top |
||||||